
 en
en
 English
How to Discharge an Air Conditioner Capacitor Safely: Step-by-Step Guide
Discharging an air conditioner capacitor takes four steps: kill the power, wait several minutes, bridge the terminals with an insulated screwdriver or a 10 kΩ discharge resistor, and confirm zero volts across every terminal pair with a multimeter. Skip any one of them and you risk a painful shock from a component that can hold a 370 V charge long after the condenser shuts down. This guide explains the complete procedure, the physics behind the residual charge, and the checks that tell you whether the capacitor is fit for another season or ready for replacement.
The method is straightforward, but the order of operations is not negotiable. Technicians who short the terminals before removing the wires, or who discharge only one pair on a three-terminal dual-run capacitor, eventually learn why that extra minute matters. Everything below is structured so you can perform the discharge, verify it with a meter, and move on to testing or replacement without guessing.
Why an AC Capacitor Can Shock You Even When the System Is Off
A run capacitor in a residential or light-commercial condensing unit is a metalized polypropylene film capacitor rated for continuous AC operation at 370 V AC or 450 V AC. While the compressor and fan motor are running, the capacitor stores electrostatic energy between its film electrodes. When the thermostat opens and the contactor drops out, that energy remains trapped because there is no closed loop between the terminals. The charge does not leak away on its own.
A 40 µF capacitor charged to 370 V stores E = ½ × 0.00004 × 370² ≈ 2.7 joules. A heavier 45 µF unit charged to 450 V stores roughly 4.6 joules. That energy will not stop a heart the way a direct line-voltage shock can, but it is enough to produce burns, a violent reflexive jerk, and a fall from a ladder.
There is also the welded-contactor scenario. If the compressor contactor sticks closed, the capacitor remains connected to line voltage even after the thermostat calls for off. Pulling the outdoor disconnect does not discharge the capacitor; it only opens the power feed at the disconnect point, and the charge already stored on the electrodes stays there. This is why the first rule of capacitor handling is to treat every unit as charged until a meter reads zero.
Tools Needed for a Safe Discharge
Every item on this list is inexpensive, and most of it probably already sits in a service bag or a home toolbox. The one tool you should never skip is the multimeter, because it converts a guess into a measurement.
| Tool | Why it matters |
|---|---|
| Insulated screwdriver | Bridges the terminal pairs to short the charge; the insulated handle protects your hand. |
| Multimeter | Verifies zero volts before you touch anything and later measures capacitance in µF. |
| 10 kΩ, 5 W resistor with test leads | Discharges the capacitor gradually without the high-current spark of a screwdriver. |
| Safety glasses | Protects your eyes if the capacitor case ruptures during the short. |
| Insulated work gloves | Adds a second layer of protection while handling the capacitor body. |
If you have only a screwdriver and a multimeter, the screwdriver method is acceptable for a one-time homeowner replacement: bridge each pair of terminals for about five seconds, expect a loud pop and a small spark on the first pair, and then verify with the meter. If you work on AC units regularly, build a discharge probe from a 10 kΩ resistor with alligator clips. The resistor limits peak current, which is easier on the capacitor's internal welded connections and eliminates the startling arc.
How to Discharge an AC Capacitor: Six-Step Procedure
Follow the steps in this exact sequence. Each step closes a gap that could otherwise leave energy in the capacitor or in the wiring around it.
- Turn off both disconnects. The breaker in the electrical panel and the pull-out block beside the condenser must both be off. Remove the pull-out block from its socket, then touch a non-contact voltage tester to the contactor terminals to confirm no line voltage is present.
- Wait two to three minutes. If the capacitor has an internal bleed resistor, most of the residual charge drains in about 120 seconds. If it does not have a bleed resistor, waiting alone will not drain it — the next steps handle that either way.
- Remove the access panel. The panel is usually held by 5.5 mm or 8 mm screws. Set it aside and locate the capacitor: a silver or black cylinder clamped to the sheet metal next to the contactor, with push-on wires on its top terminals.
- Photograph or label the wiring. Typical color conventions are brown to HERM, yellow to FAN, and black or white to C, but manufacturers vary. A phone photo taken before you remove anything guarantees correct reconnection.
- Bridge all three terminal pairs. For a dual-run capacitor, place the screwdriver blade across C to HERM, then C to FAN, then HERM to FAN. Hold each bridge for five seconds. If you are using a resistor probe, clip one lead to one terminal and touch the other probe to the second terminal.
- Verify with the multimeter. Switch to DC volts, touch the probes to each terminal pair, and confirm the reading is below 1 V — ideally 0 V. Repeat for all three pairs. Only then is the capacitor safe to handle.
The numbers behind the wait: connecting a 10 kΩ resistor across a 40 µF capacitor gives a time constant of 0.4 seconds (τ = R × C = 10,000 × 0.00004). After five time constants, about two seconds, the voltage has decayed to 0.7% of the starting value — from 370 V down to roughly 2.5 V. That is why the resistor method is both fast and quiet compared with the screwdriver arc.
Dual Run Capacitors: Discharge All Three Terminal Pairs
Most condensing units use a dual-run capacitor with three terminals: C (common), HERM (compressor), and FAN (condenser fan motor). Bridging only C to HERM leaves the FAN terminal at a dangerous potential, and bridging only C to FAN leaves HERM hot. Each terminal pair forms a separate charge path and must be shorted individually.
| Sequence | Terminal pair | Function |
|---|---|---|
| First | C → HERM | Compressor capacitor section |
| Second | C → FAN | Fan motor capacitor section |
| Third | HERM → FAN | Across both sections in series |
A single-section capacitor, used on some older units and many condenser fan motors, has only two terminals, so bridging the pair once is enough. The multimeter verification afterward is still mandatory — a wire with a broken connection inside the crimp can leave one section charged even though the other reads zero.
Common Mistakes That Lead to Shocks or Incomplete Discharges
Most capacitor-related injuries do not come from a lack of tools; they come from a partial procedure. These are the errors that show up again and again, and each one has a straightforward fix.
- Shorting the terminals while the wires are still connected. You end up shorting the compressor circuit, not the capacitor. The stored charge may not flow where you expect, and the arc can occur inside the contactor. Remove the wires first, or at minimum confirm that the contactor is open and the line side is dead.
- Discharging only the C–HERM pair on a dual capacitor. The FAN section stays charged and delivers a completely unnecessary surprise a moment later.
- Trusting the bleed resistor to drain everything. Some capacitors include an internal bleed resistor that pulls the voltage down over minutes; others do not. The resistor is a convenience, not a substitute for shorting the terminals.
- Using a screwdriver with a bare metal shaft and no insulated handle. If your hand slides forward while the blade is on the terminal, you become the discharge path. A stubby VDE-rated flathead screwdriver is the right tool.
- Assuming one discharge settles the capacitor. Polypropylene film exhibits dielectric absorption: a small amount of charge re-emerges from the film layers minutes after the short is removed. It usually returns only a few volts, but it can be a few dozen. Short the terminals again right before you begin testing or removal.
- Skipping the multimeter check. The only reliable way to document a discharge is to measure it. Zero volts on the display is the difference between confidence and luck — between the recommended procedure and the one that ends in a jolt.
After Discharging, Check Whether the Capacitor Is Still Good
A discharged capacitor is not automatically a healthy one. Start with a visual inspection: a bulged or domed top, melt marks around the terminal pad, oil streaks on the case, or a burnt smell all point to internal failure even if the meter later reads a plausible capacitance. Also check the base, where the terminal plate meets the aluminum can — cracks here are often the first visible sign of a failed pressure interrupter.
Then measure the capacitance. Set the multimeter to microfarads (µF), connect the probes to the two terminals, and wait for the reading to stabilize. Compare it with the value printed on the label. A healthy run capacitor reads within ±6% of the nameplate value. If it reads 10% or more below nameplate, the dielectric has degraded and the capacitor should be replaced — the motor will run hotter and may fail to start under load.
For a deeper dive into the measurement process, including how to test the capacitor while it is still installed and how to interpret unstable readings, see this detailed AC capacitor testing guide.
Choosing the Correct Replacement Capacitor
When the test says the capacitor is weak, the replacement rules are firm: match the capacitance value exactly, never install a lower voltage rating, and keep the same terminal style. Going from 45 µF to 40 µF, for example, reduces compressor starting torque and increases current draw during startup, which shortens motor life. Dropping from 450 V to 370 V in a 240 V system is legal but leaves no margin on a line that can swing to 253 V in some grids — matching the original voltage class is the correct move.
For air conditioning condensers and heat pumps, the standard construction is the CBB65 explosion-proof capacitor series, a metalized polypropylene film capacitor in a cylindrical aluminum case with a pressure-sensitive disconnection device. That construction is engineered for continuous AC duty and for the enclosed, high-ambient environment inside a condenser compartment. The pressure interrupter opens the internal connection if the dielectric breaks down, preventing the case from bursting — the main reason CBB65 is the default choice for compressor circuits.
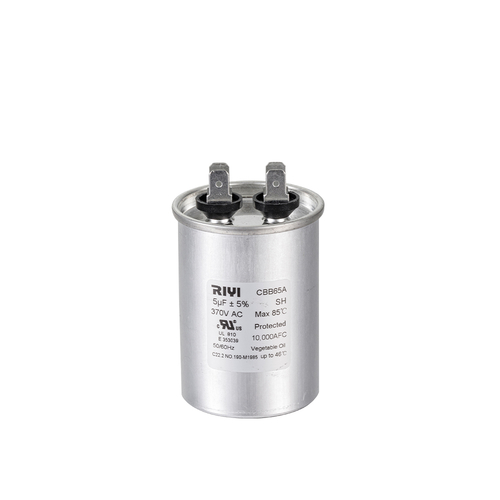 China Cbb65 Explosion-proof Capacitor Manufacturers, FactoryAs leading China cbb65 capacitor manufacturers and Explosion Proof Capacitor suppliers, Cixi Riyi Capacitor Factory produce Cbb65 Explosi...View Product →
Original capacitors with push-on terminals should be replaced with a matching insert-terminal model. A common residential failure, the 35 µF 450 V replacement capacitor with insert terminals, drops straight into the existing wiring without adapters. If the original unit used lead wires crimped or soldered to the terminals, the 25 µF 450 V lead-style capacitor is the type to look for.
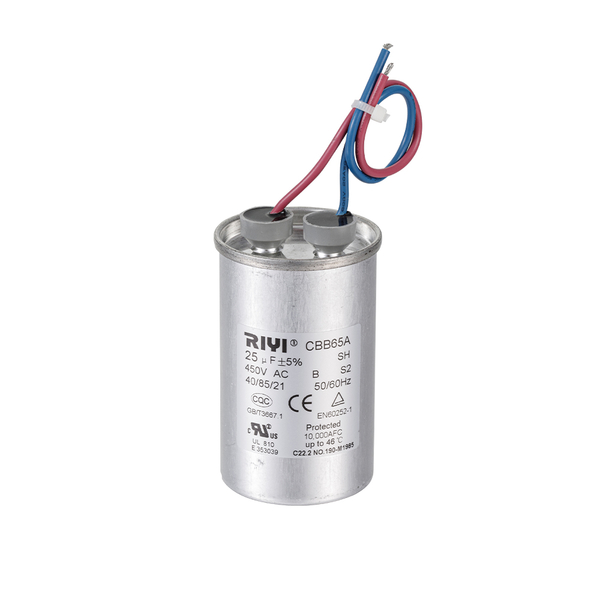 Custom AC Cbb65 25uf 450v S2 B Explosion-Proof Lead Lead CBB65 Explosion-Proof CCixi Riyi Capacitor is China custom Cbb65 25uf 450v S2 B Explosion-Proof Lead. CBB65 Explosion-Proof Capacitor Lead manufacturers and OEM...View Product →
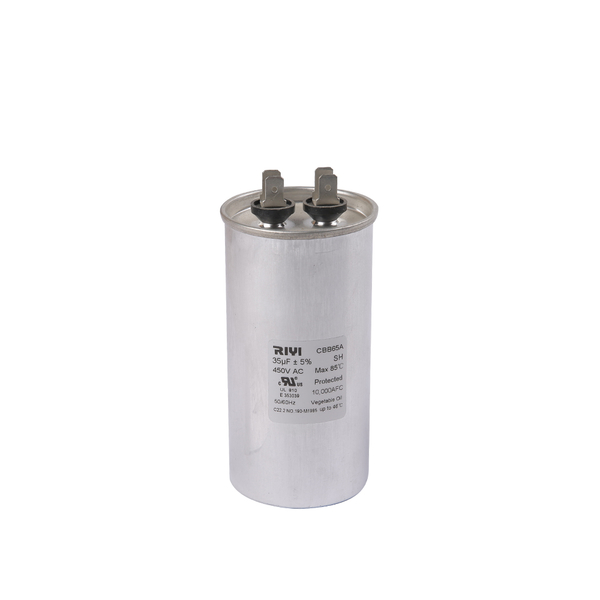 Custom AC Cbb65 35uf 450v S2 Explosion-Proof Aluminum Housing 2+2 terminal InserCixi Riyi Capacitor is China custom Cbb65 35uf 450v S2 Explosion-Proof Aluminum Housing 2+2 terminal. CBB65 Explosion-Proof Capacitor Ins...View Product →
Before ordering, measure the mounting clamp diameter — most residential condensers use 35 mm, 40 mm, 45 mm, or 50 mm clamps — and the overall height of the original can. A capacitor that fits electrically but is 10 mm taller can touch a structural brace and vibrate. The complete replacement workflow, including what to document before unwiring the old part, is covered in our AC capacitor check and replacement procedure.
Frequently Asked Questions
Can I discharge an AC capacitor with a plain screwdriver?
Yes, if the screwdriver has a fully insulated handle, the capacitor is out of the circuit, and you bridge every terminal pair for at least five seconds. Expect a loud pop and a bright spark on the first pair — that is the air ionizing as the stored energy dumps through the blade. It sounds serious but is normal. Still, verify the result with a multimeter afterward.
Why does the capacitor show voltage again after I shorted it?
That is dielectric absorption. A fraction of the charge penetrates into the polypropylene film layers and slowly drifts back to the electrode surface after the external short is removed. It is usually only a few volts to a few dozen volts — not enough to hurt, but enough to surprise. Re-short the terminals immediately before you begin working, and re-check the meter.
How long will a charged AC capacitor hold its charge?
If the capacitor has no internal bleed resistor, the charge can persist for days or weeks. A leaky capacitor will self-discharge over hours, while a fresh, high-quality unit can still read hundreds of volts the morning after the condenser was shut down. Never rely on time alone; always bridge the terminals and measure.
What voltage reading counts as “discharged”?
Below 1 V is the standard threshold. With a 10 kΩ resistor and a 40 µF capacitor, the voltage falls from 370 V to under 1 V in about two seconds, which matches five time constants of the RC network. If your meter still shows more than 1 V, hold the short for a few more seconds and measure again.
How often should the run capacitor be replaced?
Typical service life for a run capacitor in a condensing unit is 5 to 10 years, depending on heat exposure, running hours, and line voltage quality. Most technicians replace the capacitor whenever it measures more than 10% below nameplate capacitance or shows visible bulging, even if the system still runs. If you are replacing one capacitor and the other section of a dual unit also reads near its lower tolerance, replacing both at the same time avoids a repeat service call. Understanding what can go wrong when a capacitor degrades — including motor overheating and hard-starting — is covered in this overview of failed AC capacitor dangers.

- Tel: +86-13600614158
- E-mail: mina@cxriyi.com
- Address: Zonghan Street,Cixi City, Zhejiang Province, China.
Copyright © CIXI RIYI CAPACITOR FACTORY
All Rights Reserved.
